This guide will assist you in creating your LinkedIn or LinkedIn+Emails campaigns and hopefully achieving your outreach goal. Before you start using the campaigns, make sure that your LinkedIn connection and/or Email Account for outreach are properly set up ✔️
Before we continue, please note that while the campaign is active before making any changes we suggest pausing the campaign first, and reactivating it once the changes are made.
1. Only LinkedIn campaign
Navigate to the main Menu on the left side and click on "Drip Campaigns" ➡️ "Create Campaign".
First things first ➡️ to create an ONLY LinkedIn campaign, click on Get Started beneath the LinkedIn Campaign icon:
%20Campaign/image%20(21).png)
Next, select one of the 2 main options:
-
Start a completely new campaign with a blank canvas for you to build a campaign according to your preferences, or
-
Copy an already existing campaign (but be able to make some changes to it if you need to) / select a pre-built campaign from our campaigns library

If you select New Campaign :

-
Type in the Name of your new campaign
-
Select the LinkedIn Account from which you'll send out the LinkedIn actions in your campaign
-
Select who's allowed to see your campaign - Private (visible only to you) or to all company users (everyone using that Sales.Rocks account)
-
How many new prospects will be enrolled per day*. We recommend that you enrol 15 or fewer contacts per day per LinkedIn campaign since you wouldn't want to be blocked by LinkedIn for too many actions per day.
* Number of prospects enrolled per day refers not to the number of daily sent emails or messages but to the number of NEW people/prospects from your list, for which the campaign will start on that day. The campaign will continue running for the prospects that have already been previously enrolled.
❗Important note: In addition to the above recommended 15 or fewer enrolled contacts per day in your LinkedIn campaign, be aware that LinkedIn also imposes a limit on actions per day. For that reason, we strongly recommend setting delays between the LinkedIn actions.
For example, View Profile -> Set Delay -> Send Connection Request
If you select Copy :
%20Campaign/image%20(26).png)
Choose which campaign you'd like to make a copy of: from your previous campaigns (My Campaigns), shared with you from some of your colleagues (users of your Sales.Rocks account) or from suggested Sales.Rocks templates.
Once you select the type of campaign, the next step is to choose your audience ➡️ the prospects you'll send this campaign to.
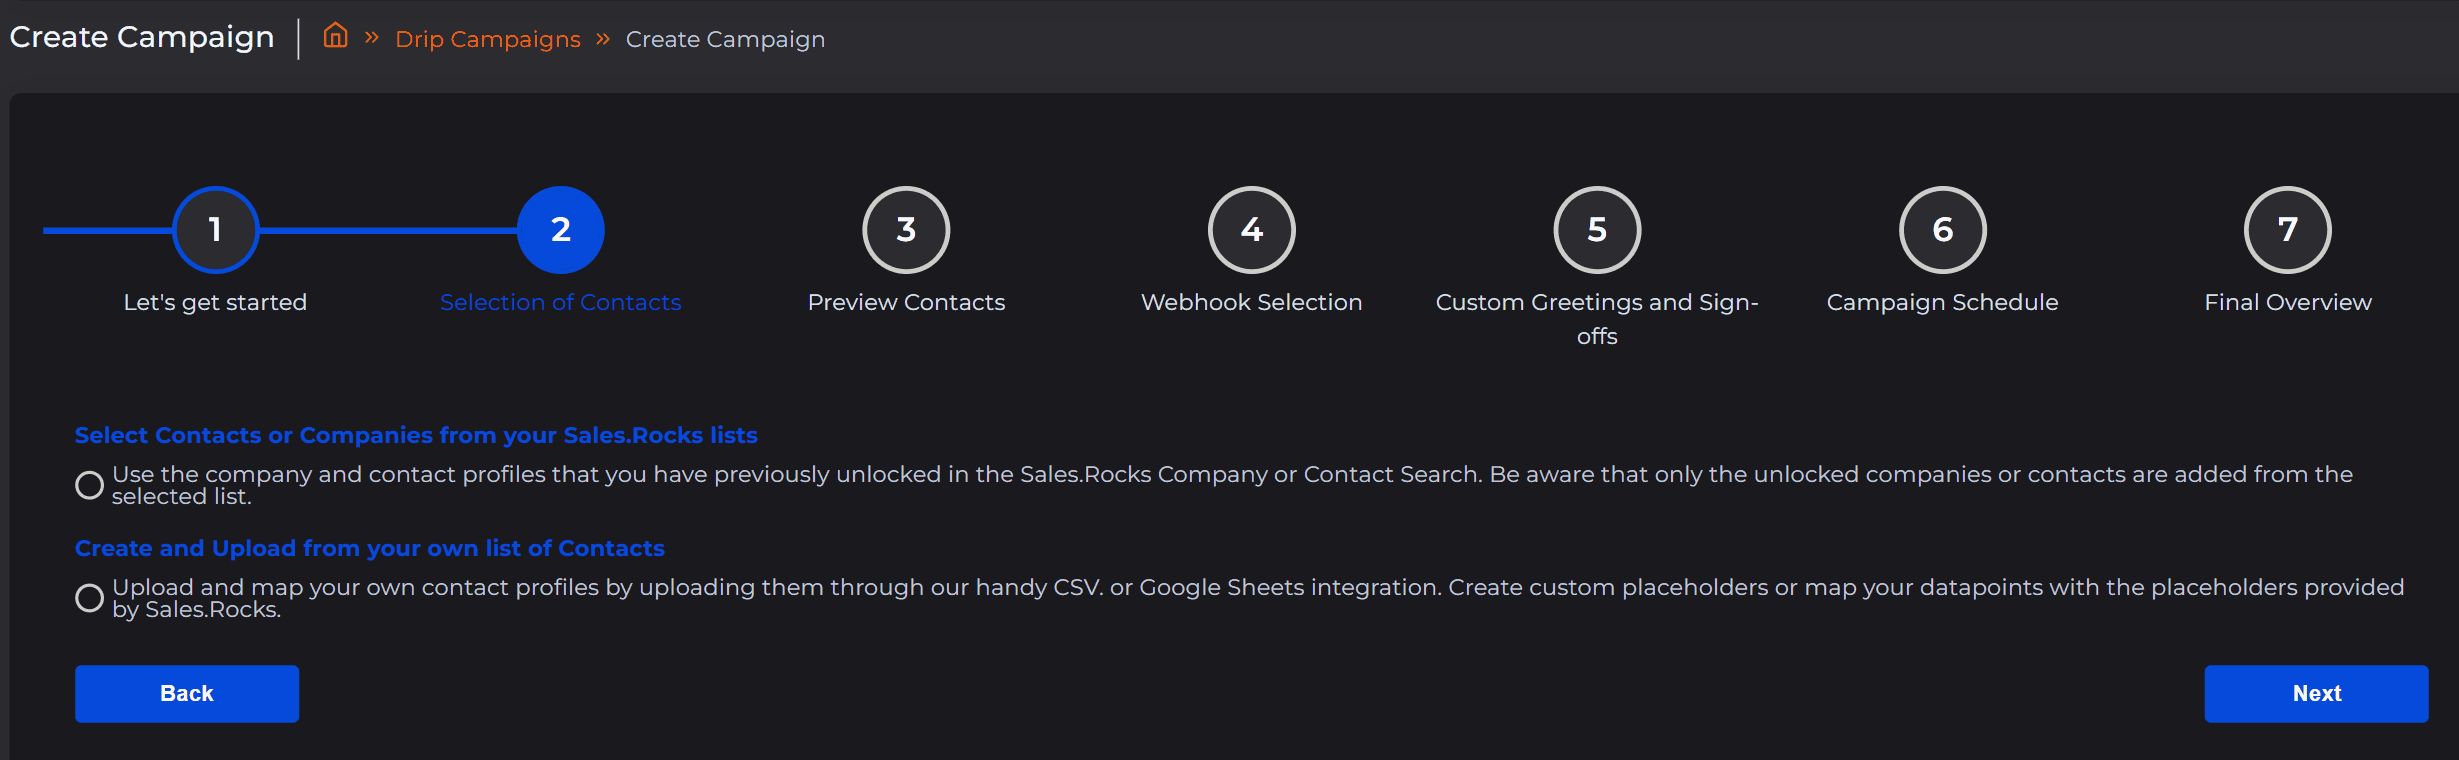
You can either:
-
Choose a list of contacts that you've saved in a previous search in Company/Contact Search, or
-
Upload your own list of contacts
❗Important notes❗
-
If you choose a list from Sales.Rocks, please make sure that you unlock the contact profiles in "My Lists" first, otherwise, if the data is locked, it won't be available to be used within a campaign.
-
Please make sure that the contacts you're using have a LinkedIn Profile URL included, in the prospect list for your campaign in order to fulfil a LinkedIn action. Otherwise, those who do not have the URL included, won't be contacted. For this matter, you can use the LinkedIn filter in Contact Search: Add Filter >> Contact info on Contact Level >> LinkedIn profile included.
-
If you choose to upload your own CSV/Google Sheet URL file, please make sure to have their LinkedIn Profile URLs included.
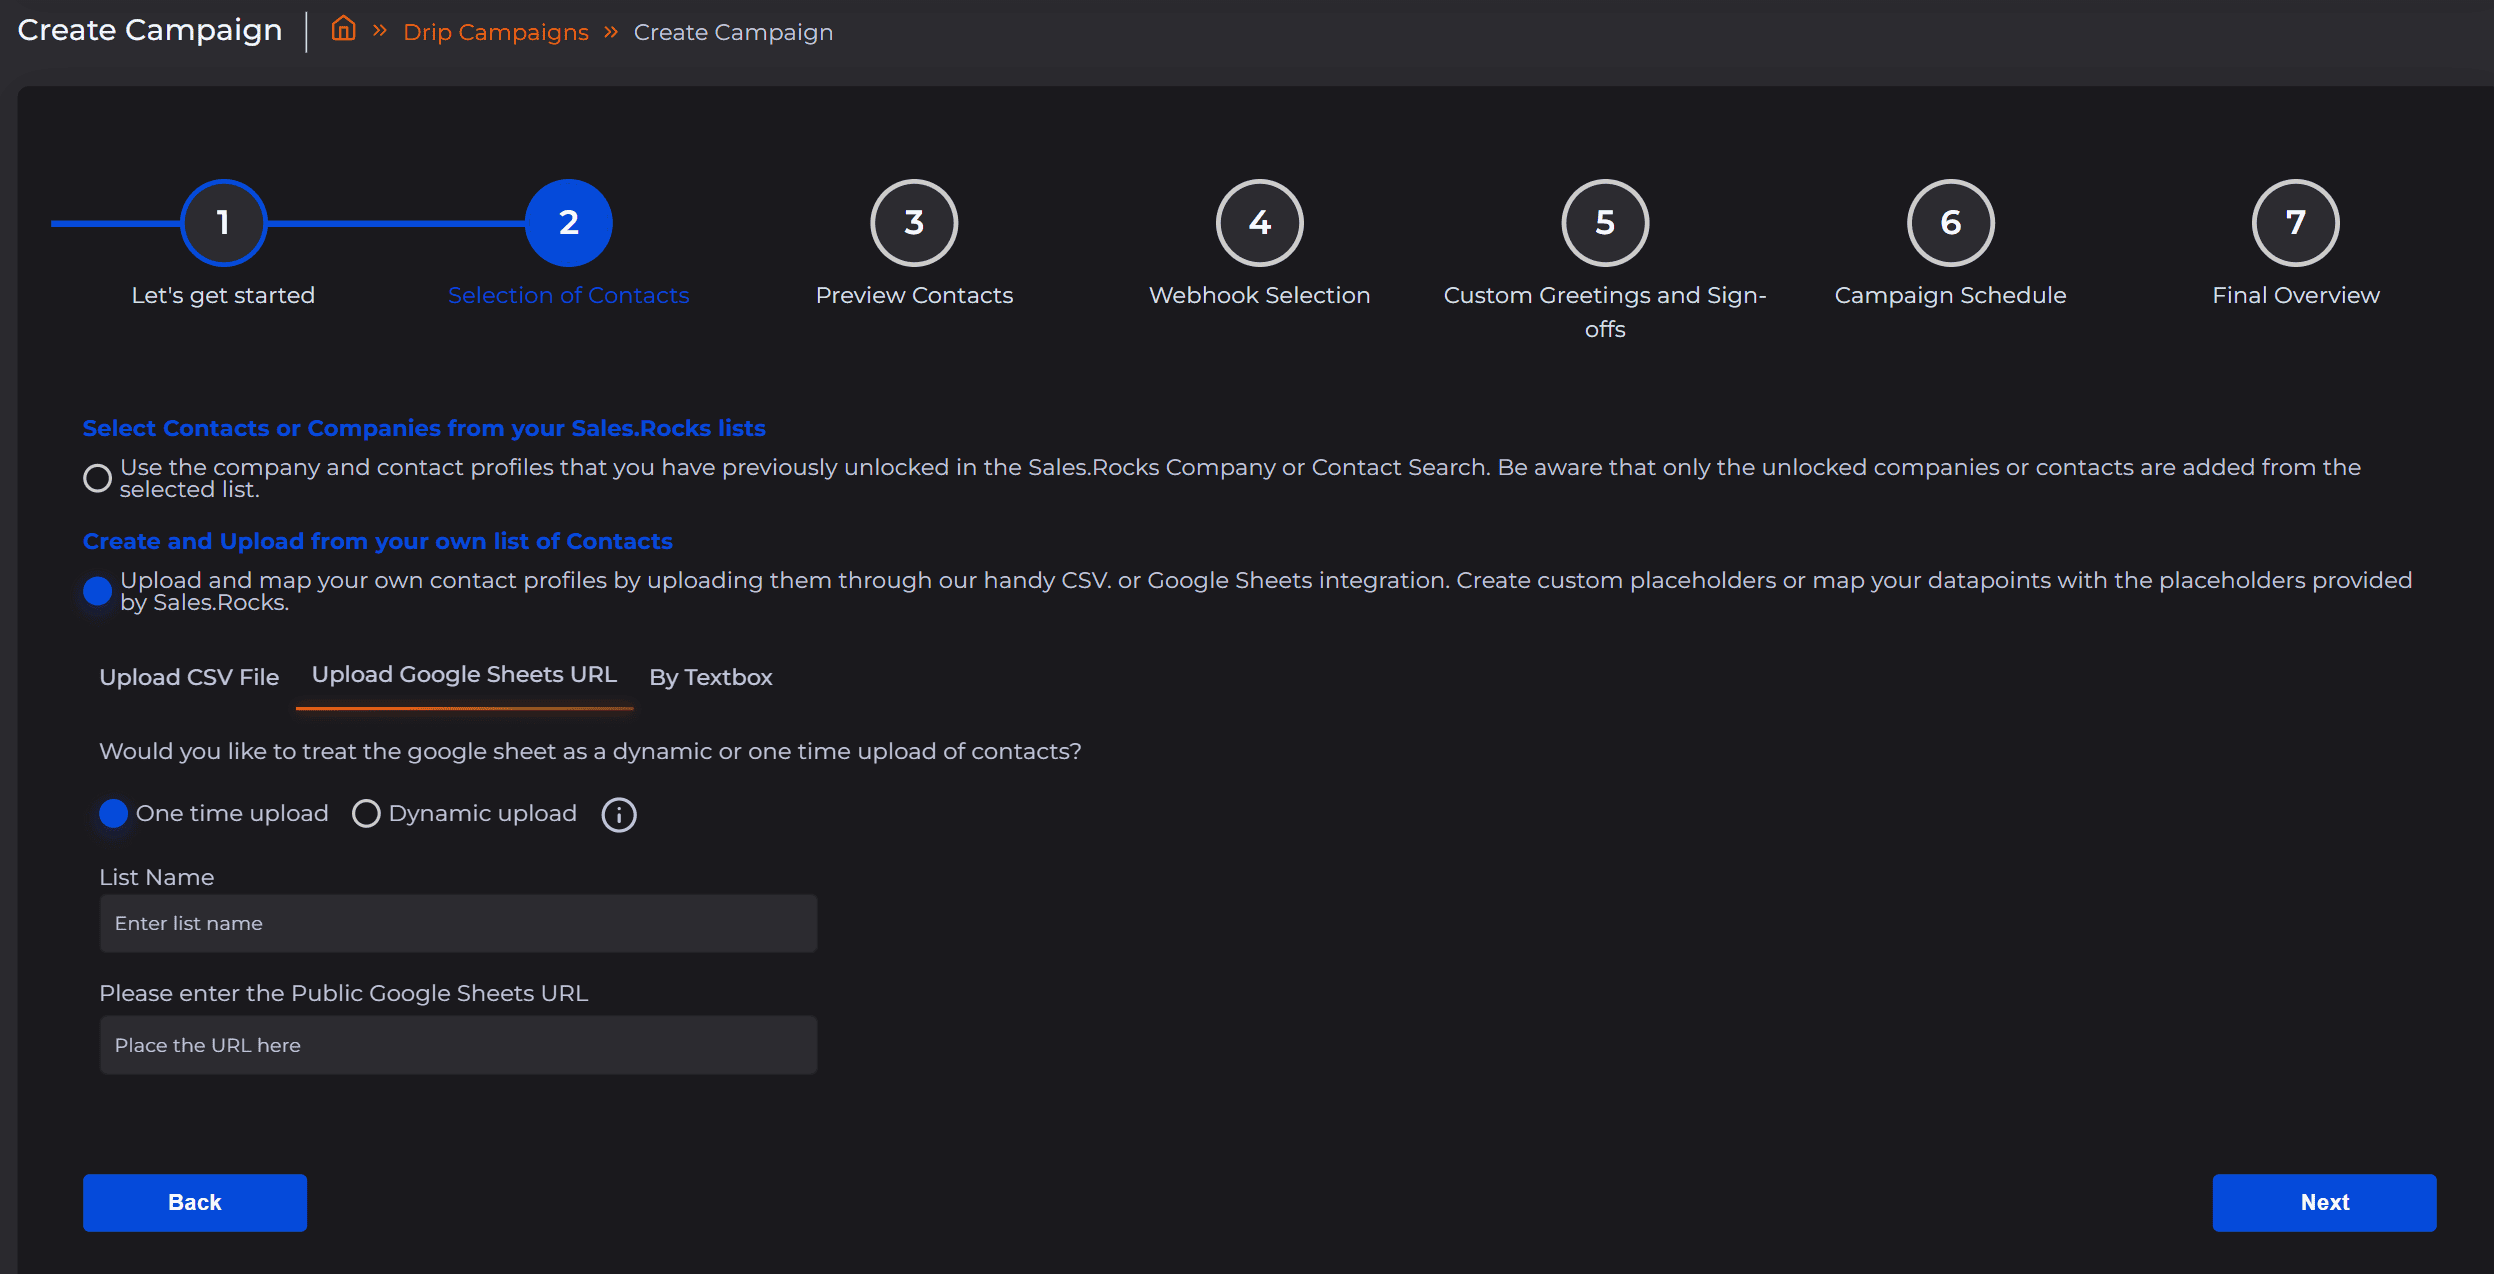
If you choose to upload your own file, it can be done by either:
-
Uploading a CSV file (Comma Separated Value or Comma Delimited), or
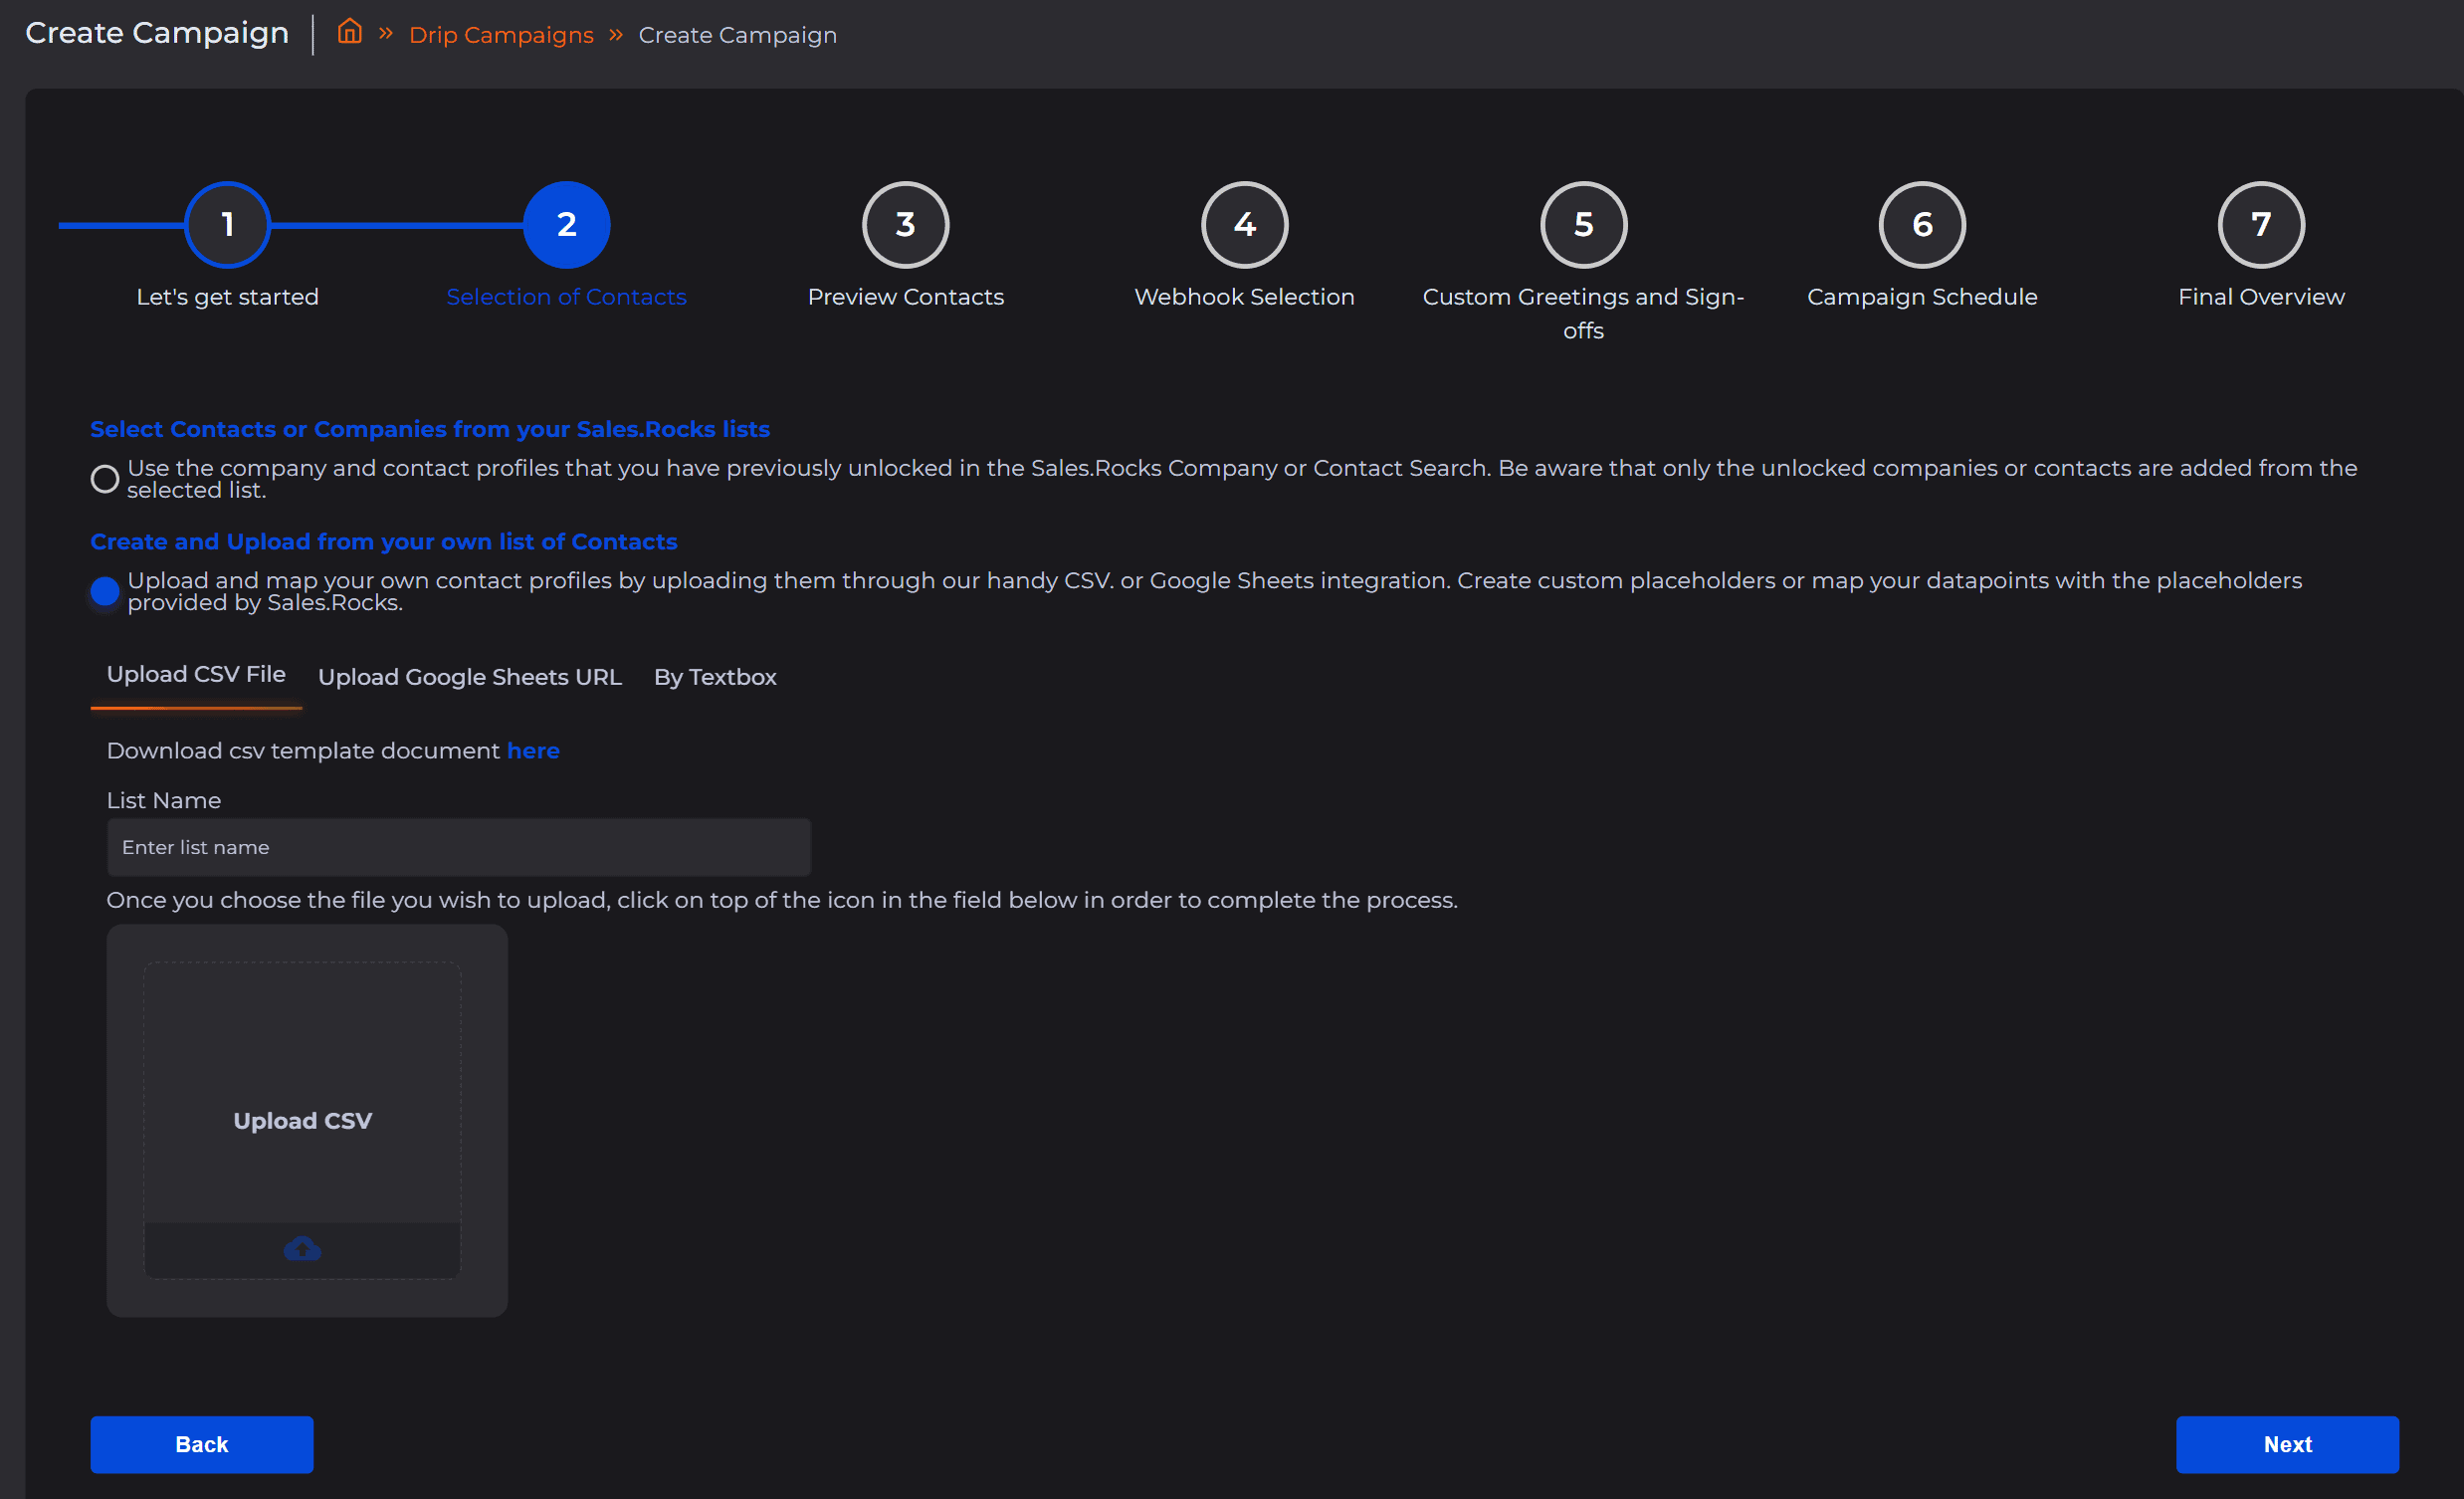
-
Uploading a Google Sheet URL, in which case, please make sure that the URL is publicly available (shareable)
In the first 2 cases, you'll be asked to map the columns from your file with the columns from Sales.Rocks, like in the example below:
%20Campaign/image%20(30).png)
Here's an example of how a Google Sheet document should look like (1 data point per each column, same for CSV comma delimited):
%20Campaign/image%20(31).png)
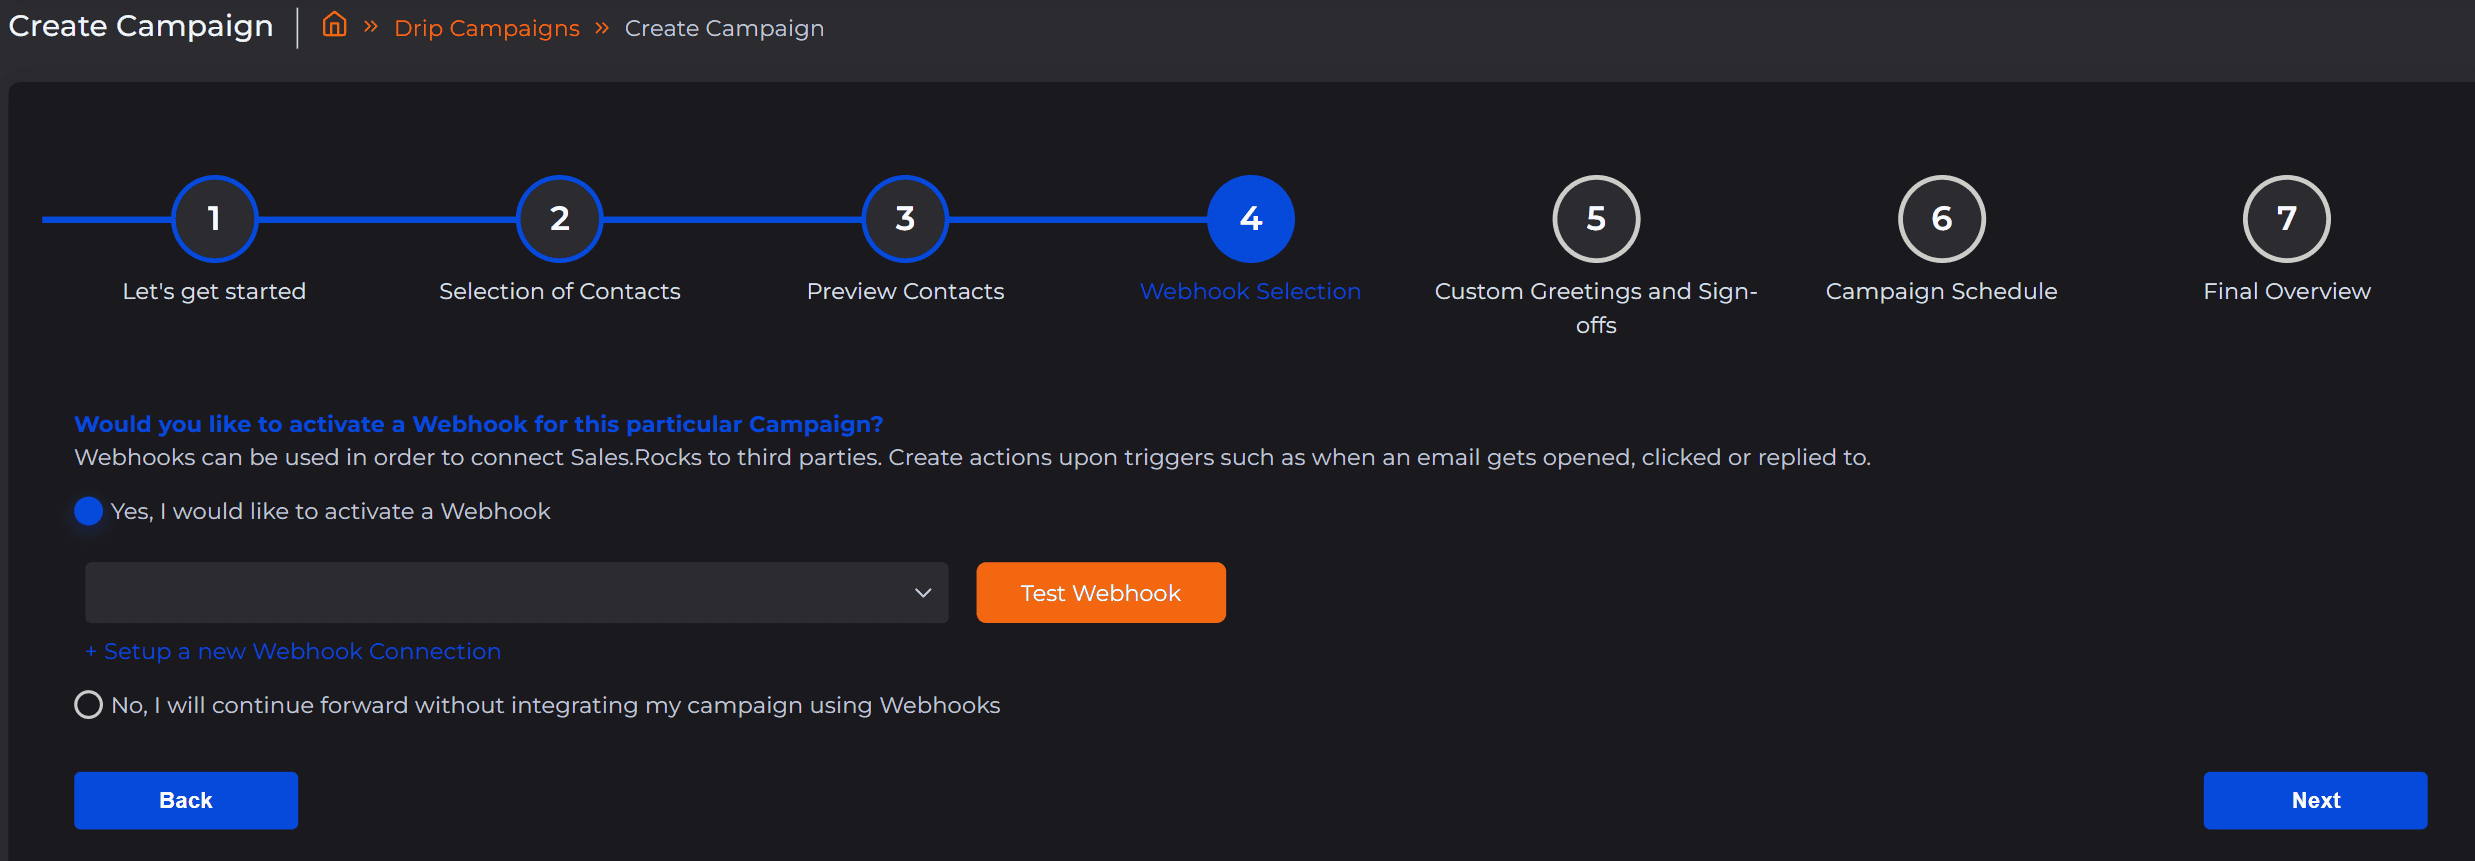
After you choose your contacts and get a preview of them in step 3 ➡️ , in the 4th step you can decide if you would like to activate a webhook or continue without integrating the campaign using Webhooks:
Afterwards, in the 5th step, you can add different greetings in a "pool" of greetings and sign-offs, and your chosen greetings will be randomly distributed to the recipients. This option supports custom greetings in different languages as well:
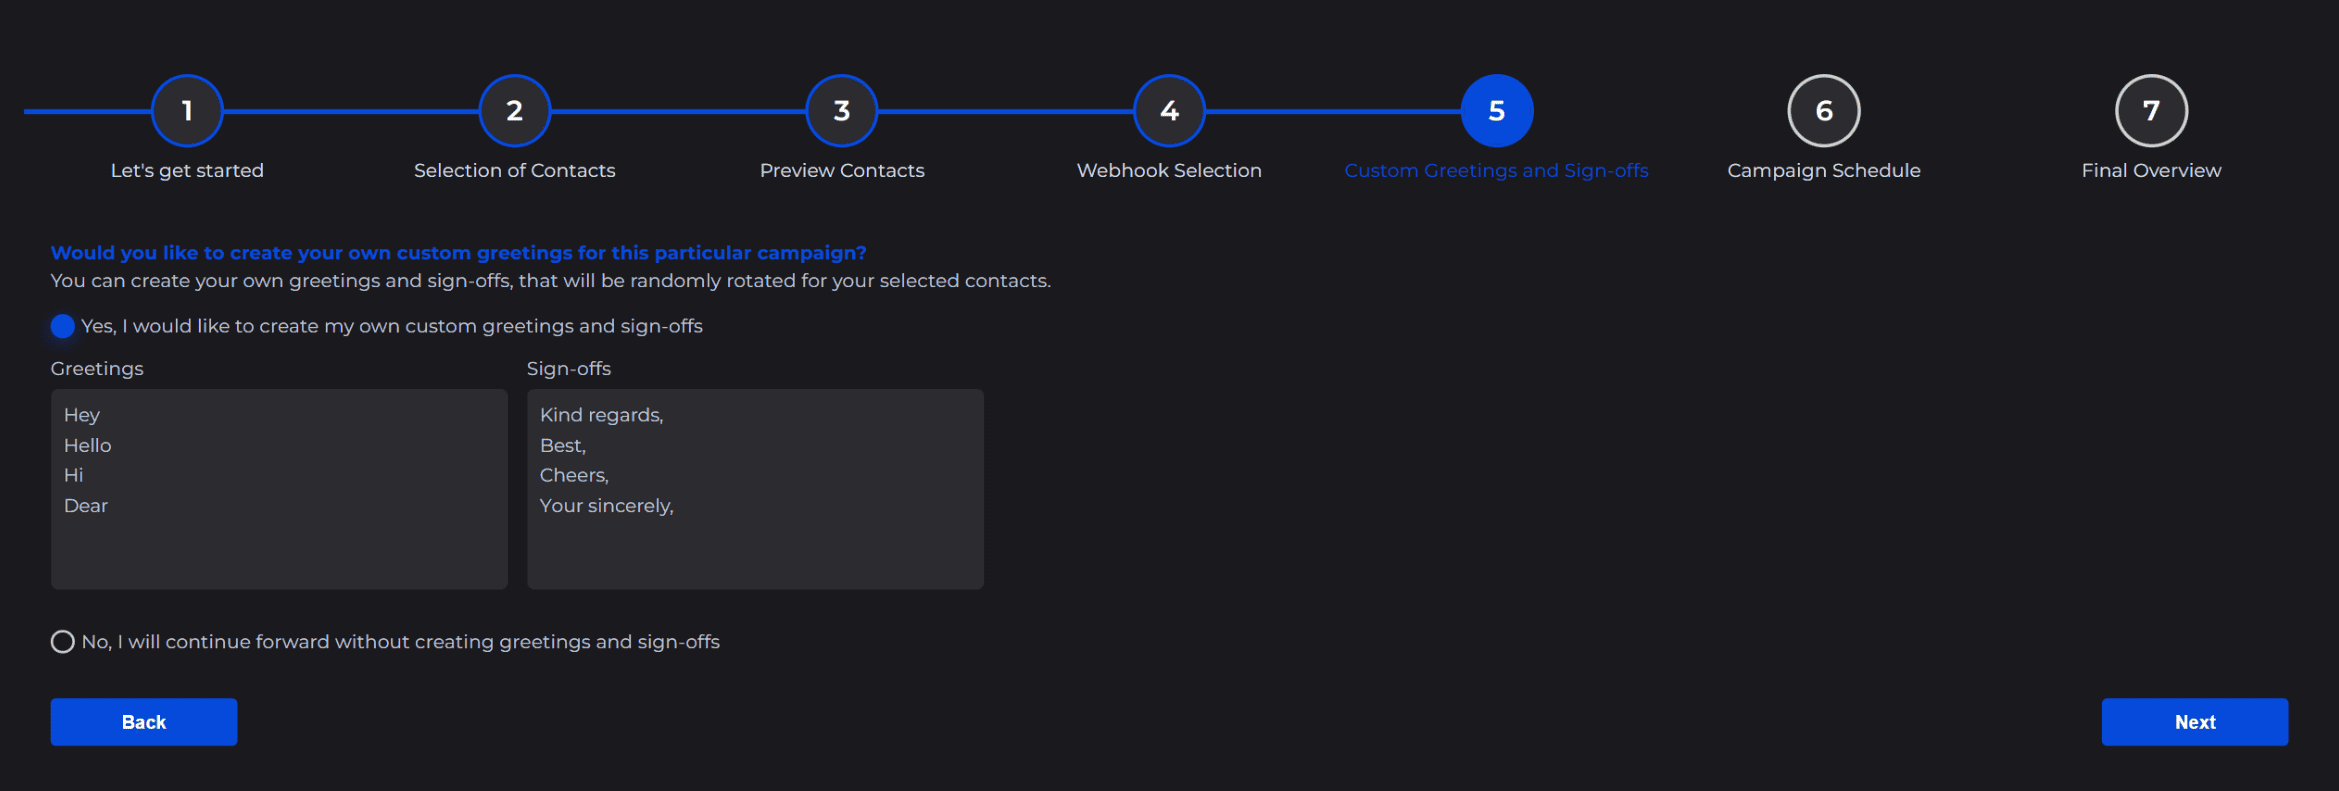
Don't forget to add the custom [[greetings]] and [[endings]] tags in your campaign text, and you are done!

You can set up the schedule of your campaign in step 6, by choosing:
-
A new schedule, or
-
Previously created schedule for some other campaign
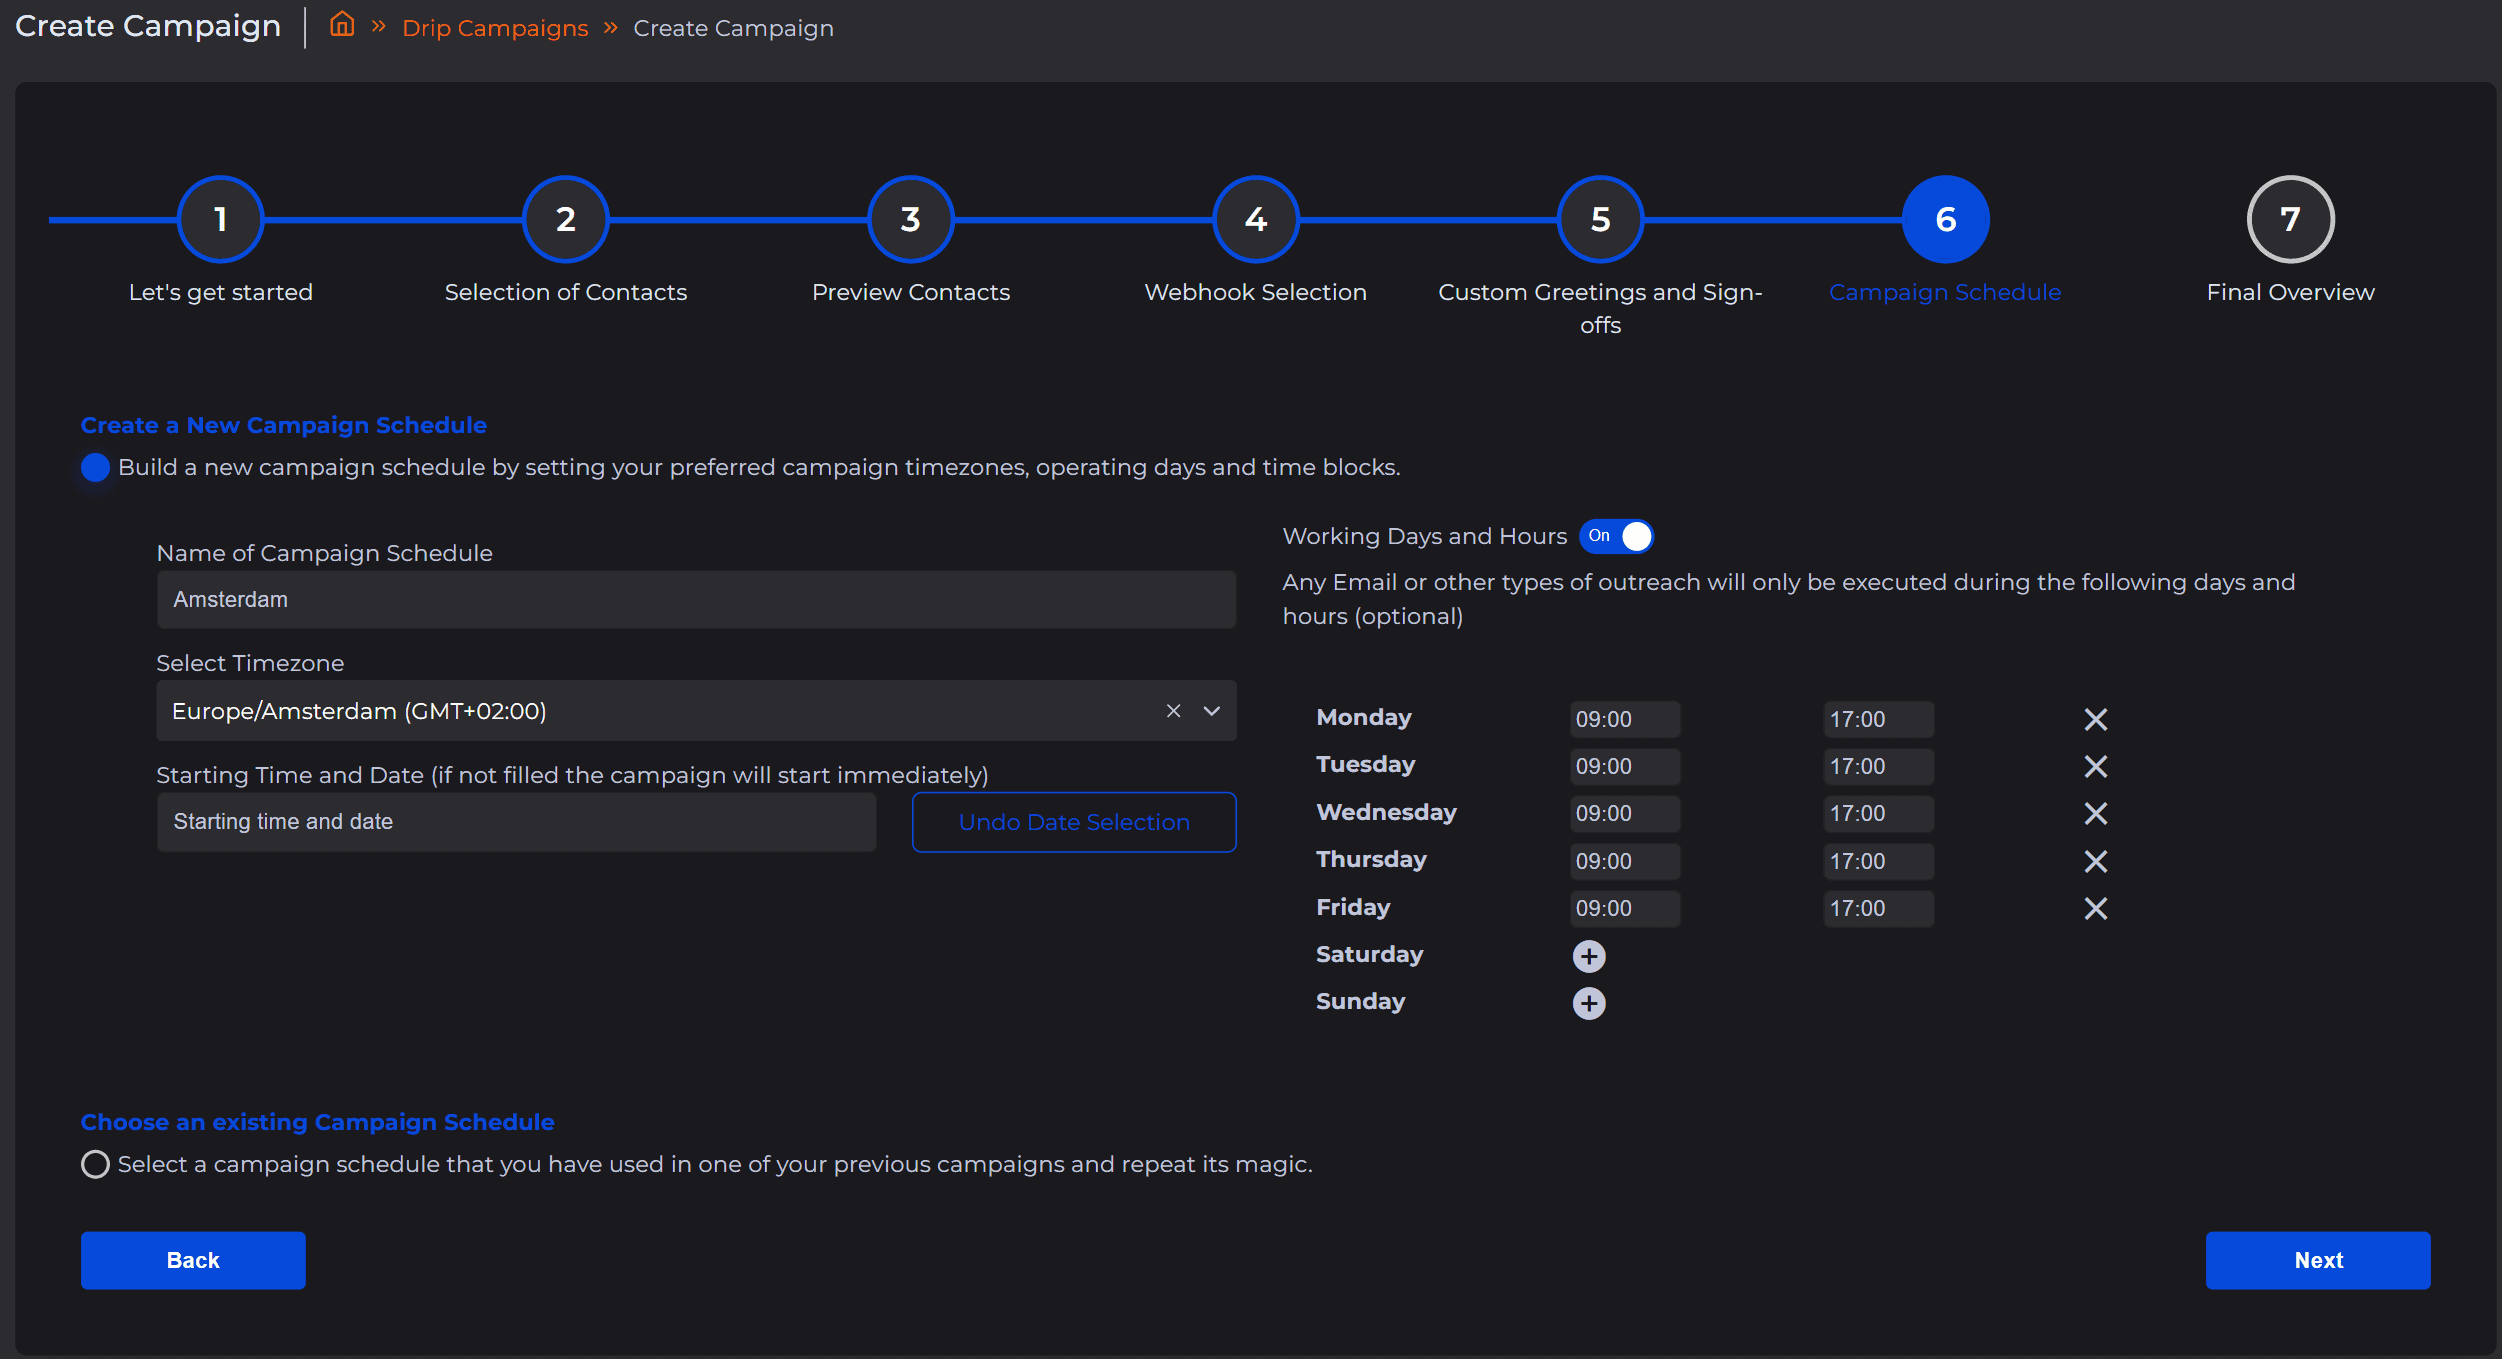
When creating a schedule, you'll be asked to:
-
Enter a name for your schedule
-
Select the Timezone in which you'd like the campaign to be sent
-
Starting date and time ➡️ please make sure this option is always set in the future of the moment you'll click on "Start Campaign". Take into consideration how much time you would need to finish setting up and building this campaign, so give yourself at least a day to finish these settings, before the campaign starts
-
If you'd like the campaign to be sent only during work days and hours, only during weekends or only on certain weekdays at a certain time period, then make sure to Enable the Timeblocks option
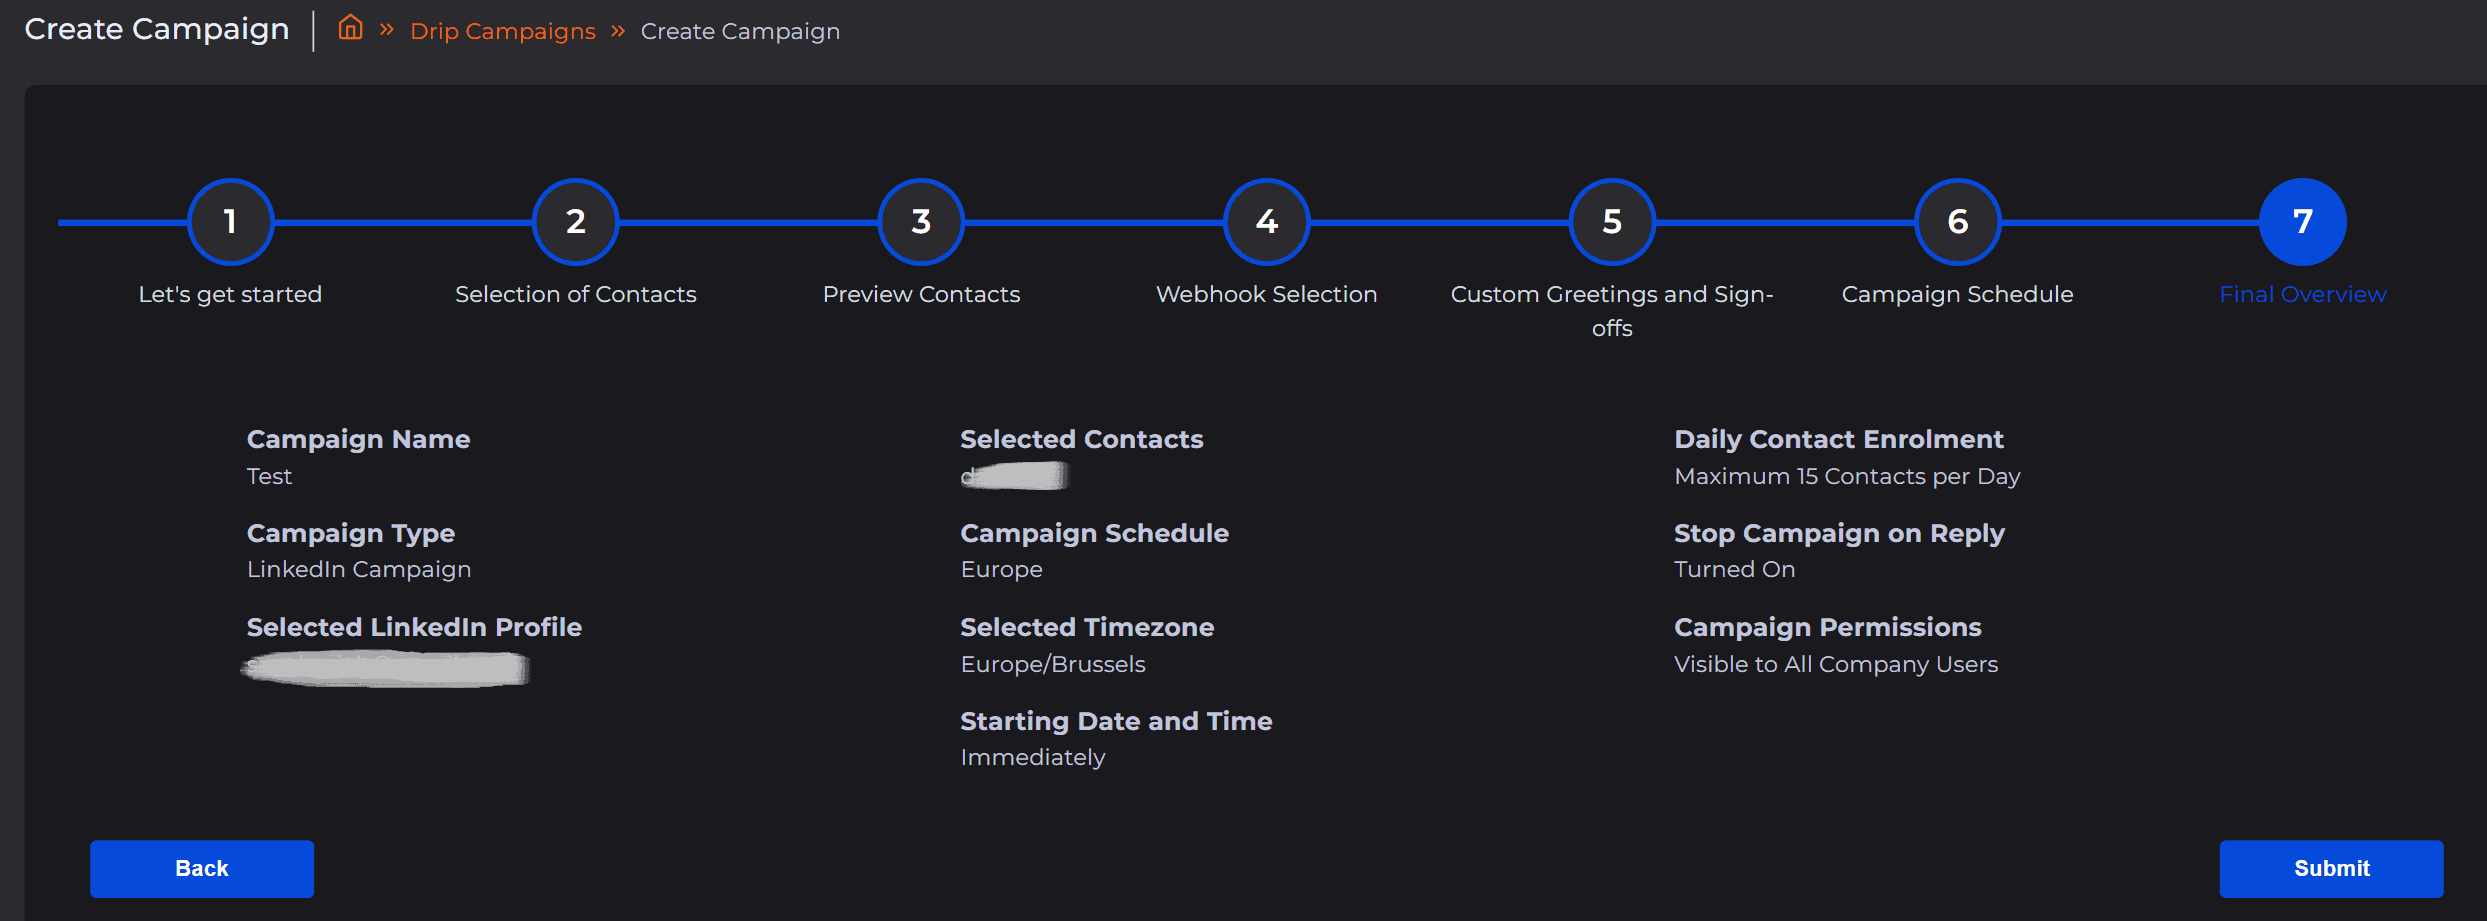
At the end of this journey, check the general overview of everything you set up in the previous steps.
Continue with building your LinkedIn campaign the way you wish, by selecting different LinkedIn actions:
-
Check if profile connected
-
Send a Connection Request
-
Send Direct Message
-
Like recent post
-
View profile
%20Campaign/image%20(34).png)
Drag and drop in the Campaign Builder any of these options, according to your preferences. Don't forget to connect them with each other (white nodes on arrows above) and give the campaign an order in which it will flow.
With the action to Send Direct Message, you can also include Custom tags to make the message more personal:
%20Campaign/image%20(35).png)
Once your campaign is built according to your goals, click the " Start " button. Good luck! 💪
2. LinkedIn + Email Campaign
Please follow the same steps from the beginning in this guide, with the difference of selecting the third option in the very first step:
%20Campaign/image%20(36).png)
Here's an example of a LinkedIn + Email campaign:

These are the basics on how to create your campaigns 😎
We hope this guide is useful and makes using this module much easier 🧡
👀 Check related articles for more information on how to check the status of your Drip Campaigns.
If there is anything left unclear, always feel free to reach out to help@sales.rocks 📧