Hey Sales.Rocky 👋
Having an SPF record for your domain is one of the key steps in ensuring your email deliverability remains high. It protects your domain and prevents others from sending malicious emails in your domain’s name. So let’s see what an SPF record is and how to set up one for your domain ⬇️
What is an SPF record?
An SPF record is a crucial part of an SPF (Sender Policy Framework) check, an email authentication process used to validate if an incoming email is being sent by an authorized domain.
It protects your domain from email spoofing, a process spammers use to send emails from a forged email address but made to appear as if they come from you. Also, it prevents your emails from being marked as spam as it validates they are sent from your domain.
What is a TXT record?
A TXT record allows domain administrators to add text additional information to the DNS. This type of record can be used for different purposes, with the most common use being domain verification.
For example, an SPF record is a TXT type of record present in your DNS.
What is the purpose of an SPF record?
An SPF record specifies the email servers that can send emails for your domain. It acts as a white list containing all the domains and IP addresses that are authorized by your domain to send emails.
When you send an email, the receiving email server checks your domain’s SPF record to see if the domain the email is coming from is in the record and is authorized to send emails. So it’s purpose is to show the receiving email server that the email comes from an authorized email-sending source.
An SPF record is only one part of a layered email authentication process and is used in combination with DKIM and DMARC to enable secure email communication, fight spam and improve email deliverability.
Can you set up multiple SPF records?
The short answer is no. Having multiple SPF records is verboten as the Germans would say. In other words, having duplicate or multiple records is not allowed and you should have only one SPF record per domain. Otherwise, you may fail the SPF authentication check.
If you are using multiple email services and you want to verify them we got you covered. You can merge multiple SPF records in one record.
For example, if you are using Gmail and Zoho for sending emails you’d have the following SPF records:
v=spf1 include:_spf.google.com ~all
v=spf1 include:_spf.google.com ~all
v=spf1 include:zoho.com ~all
To merge them into one SPF record just do this:
v=spf1 include:_spf.google.com include:zoho.com ~all
v=spf1 include:_spf.google.com include:zoho.com ~all
Now your SPF record is in order.
Should I use “~all” or “-all” in my SPF record?
Glad you asked. In short, the difference between the two is if you use the “-all” mechanism in your SPF record, then only the email services and IP addresses listed in the SPF record will be verified as coming from your domain. On the other hand, the “~all” mechanism tells the receiving email server to accept messages coming from an IP address or an email service not listed in your SPF record but to mark them as suspicious just to be sure.
It is generally recommended to use the “~all” mechanism for your SPF record so as to not run into the issue of getting your legitimate emails classified as spam.
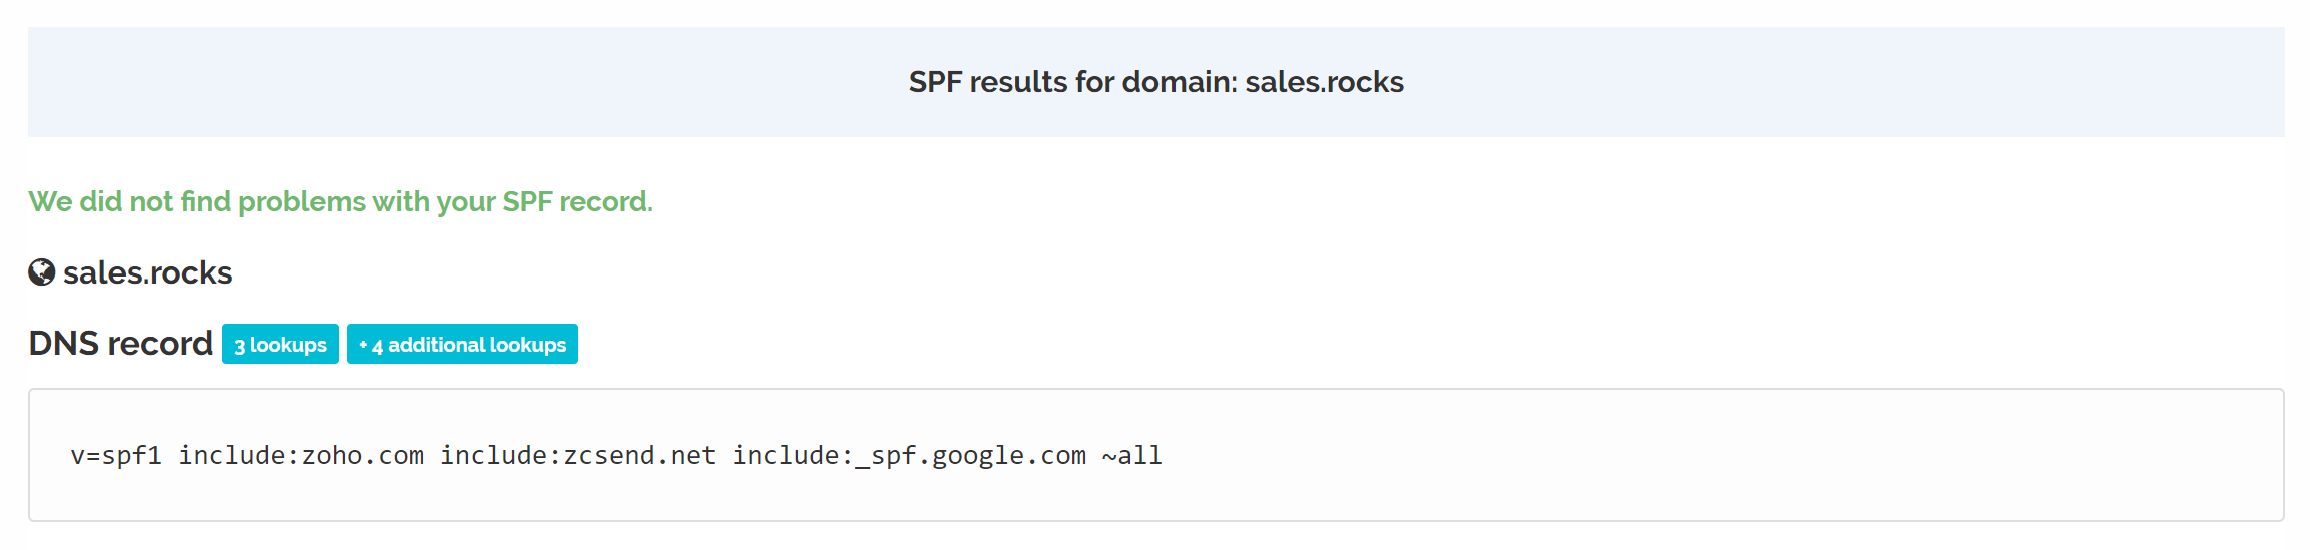
How to check your SPF record
To make sure your domain doesn’t already have an SPF record or to check if your new SPF record is set up properly and you have a green light, you can use an SPF checker. You can do a quick and easy check with this neat SPF checker 👀
How to set up an SPF record for your sending domain.
In this step-by-step guide, we’ll show you how to quickly set up an SPF record for Google (Gmail), Microsoft Office 365 (Outlook) and Zoho (covering multiple services). We’ll focus on several domain providers and also show you a general SPF record setup that you can use for other domain providers as well as how to set up an SPF record in cPanel.
Note: Leave the TTL value as default.
Google, Microsoft Office 365 & Zoho SPF record setup:
-
General SPF record setup for all domain providers
-
SPF record setup for cPanel
-
SPF record setup for Cloudflare
-
SPF record setup for Bluehost
-
SPF record setup for GoDaddy
-
SPF record setup for Namecheap
Let’s do this by the book, step by step.
General SPF record setup for all domain providers
1. Log in to your domain providing service
1. Go to the DNS settings
2. Add a new record
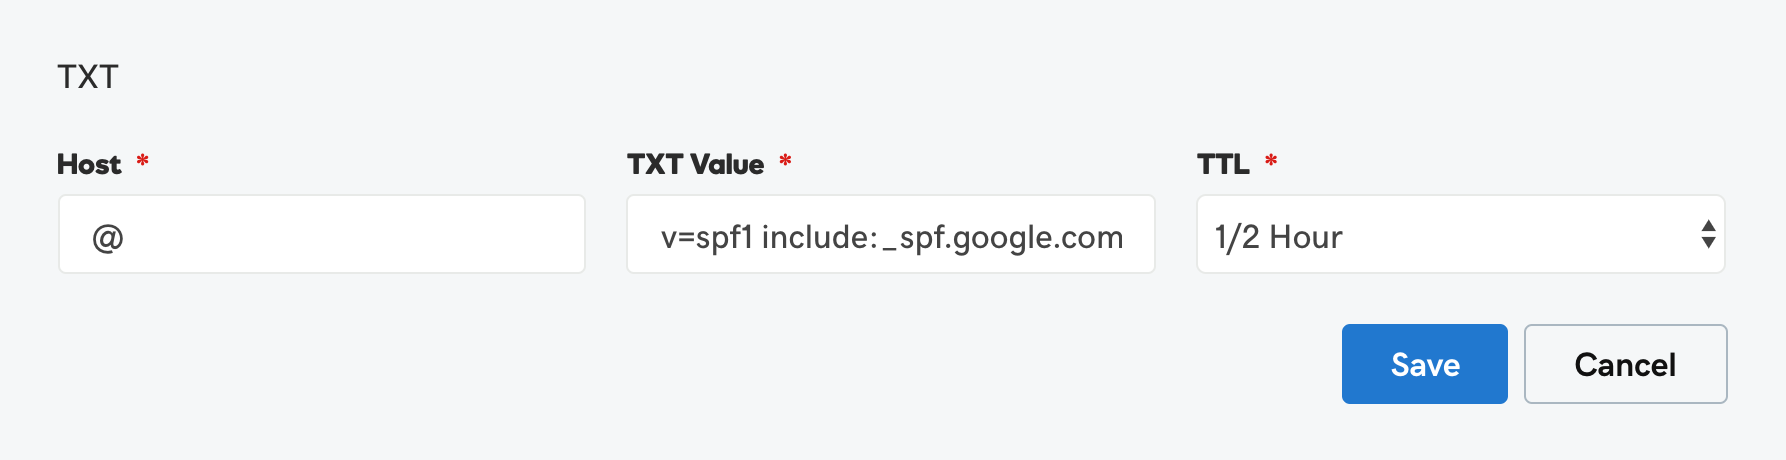
3. Select the TXT record type
4. Add "@" in Host or Name field
5. In the Record field put one or more of the following depending on which email services you will be using:
Google SPF record setup
v=spf1 include:_spf.google.com ~all
Microsoft Office SPF record setup
v=spf1 include:spf.protection.outlook.com -all - Microsoft Office 365
Zoho SPF record setup
v=spf1 include:zoho.com ~all - Multiple Zoho services
v=spf1 include:zoho.eu ~all - Multiple Zoho services EU region
v=spf1 include:zoho.in ~all - Multiple Zoho services Indian region
SPF record setup for cPanel
1. Log in to cPanel
2. Navigate to the Domains section
3. Select the Zone Editor
4. Click the Manage button next to your domain name
5. Click the Add Record button
6. In the Name field select the domain
7. Select the TXT record type
8. In the Record field put one or more of the following depending on which email services you will be using:
Google SPF record setup
v=spf1 include:_spf.google.com ~all
Microsoft Office SPF record setup
v=spf1 include:spf.protection.outlook.com -all - Microsoft Office 365
Zoho SPF record setup
v=spf1 include:zoho.com ~all - Multiple Zoho services
v=spf1 include:zoho.eu ~all - Multiple Zoho services EU region
v=spf1 include:zoho.in ~all - Multiple Zoho services Indian region
9. Click the Add Record button and you’re done!
SPF record setup for Cloudflare
1. Log in to Cloudflare
2. Click the DNS button
3. Click the Add record button
4. Select the TXT record type
5. Set Name to @
6. In the Content field put one or more of the following depending on which email services you will be using:
Google SPF record setup
v=spf1 include:_spf.google.com ~all
Microsoft Office SPF record setup
v=spf1 include:spf.protection.outlook.com -all - Microsoft Office 365
Zoho SPF record setup
v=spf1 include:zoho.com ~all - Multiple Zoho services
v=spf1 include:zoho.eu ~all - Multiple Zoho services EU region
v=spf1 include:zoho.in ~all - Multiple Zoho services Indian region
7. Click the Save button and you’re done!

SPF record setup for Bluehost
1. Log in to Bluehost
2. Go to Domains and select your domain
3. Click the Manage button
4. Select the DNS tab
5. Click Add Record in the TXT section
6. Set Host Record to @
7. In TXT Value put one or more of the following depending on which email services you will be using:
Google SPF record setup
v=spf1 include:_spf.google.com ~all
Microsoft Office SPF record setup
v=spf1 include:spf.protection.outlook.com -all - Microsoft Office 365
Zoho SPF record setup
v=spf1 include:zoho.com ~all - Multiple Zoho services
v=spf1 include:zoho.eu ~all - Multiple Zoho services EU region
v=spf1 include:zoho.in ~all - Multiple Zoho services Indian region
8. Click Save and you’re done!

SPF record setup for GoDaddy
1. Log in to GoDaddy
2. Under the My Products, find your domain
3. Click the DNS button
4. Click the ADD button
5. Select the TXT record type
6. Set Host to @
7. In TXT Value put one or more of the following depending on which email services you will be using:
Google SPF record setup
v=spf1 include:_spf.google.com ~all
Microsoft Office SPF record setup
v=spf1 include:spf.protection.outlook.com -all - Microsoft Office 365
Zoho SPF record setup
v=spf1 include:zoho.com ~all - Multiple Zoho services
v=spf1 include:zoho.eu ~all - Multiple Zoho services EU region
v=spf1 include:zoho.in ~all - Multiple Zoho services Indian region
8. Click Save and you’re done!
SPF record setup for Namecheap
1. Log in to Namecheap
2. From Domain list, select your domain
3. Click the Manage button
3. Click on the Advanced DNS tab
4. Click on the Add new record button
5. Select the TXT record type
6. Set Host to @
7. Under value add one or more of the following depending on which email services you will be using:
Google SPF record setup
v=spf1 include:_spf.google.com ~all
Microsoft Office SPF record setup
v=spf1 include:spf.protection.outlook.com -all - Microsoft Office 365
Zoho SPF record setup
v=spf1 include:zoho.com ~all - Multiple Zoho services
v=spf1 include:zoho.eu ~all - Multiple Zoho services EU region
v=spf1 include:zoho.in ~all - Multiple Zoho services Indian region
8. Click on SAVE ALL CHANGES and you’re done!

Now that your domain’s SPF record is set up correctly and protects it from spoofing you’re good to go 😎 As SPF verifies that the emails coming from your domain are actually yours, it also makes sure the emails you send don’t end up in spam and improves your email deliverability by getting them to where they need to go, in the inbox.
Setting up your SPF record is but one step in the process of ensuring high email deliverability. Your next step is generating and setting up your domain’s DKIM and MX records. Check related articles for more info! 👀