Before we get started on how to set up the Sales.Rocks Webhooks, we need to go over the usage and what's required to implement them on your Sales.Rocks account.
However, in order to make 2 apps communicate, they both need to "speak the same language", which more often than not is not possible with direct integration.
This is why you need a 3-rd party specialized app to be the "mediator" between them.
The 3-rd party apps are usually Workflow automation apps like Zapier, Zoho Flow, Pabbly Connect, etc. can automate and connect different apps by a shared base of triggers and actions.
The Webhooks are available for the Drip-Campaigns Module on the Sales.Rocks Platform. There are 3 possible "messages" or triggers you can send from Sales.Rocks to another app:
-
Upon opened email
-
Upon clicked email
-
Upon reply
This means that you can trigger the webhook to push the information to the other app, or list when a certain action is fulfilled.
So, if you want to have the information on who opened, clicked, or replied to your Sales.Rocks campaigns directly in your CRM or in a Google Sheet, read along 👇
To be able to set up and use the Sales.Rocks Webhooks you would need:
1. A Sales.Rocks account
2. Access to a 3-rd party workflow automation tool that works with Webhooks (Premium Zapier account, Zoho Flow access, or similar)
3. Account on the other app you would like to connect with Sales.Rocks data (Google Sheets, any type of CRM, or relevant Sales or Marketing tools)
1. Creating the Webhook URL in the 3rd-party App
In order to get the webhook URL, you will need to start the initial setup within the Workflow automation tool of your choice.
For this example, we'll use the Zoho Flow tool, but the steps are very similar for the rest of the apps.
Go to your Zoho Flow and create a new Flow:
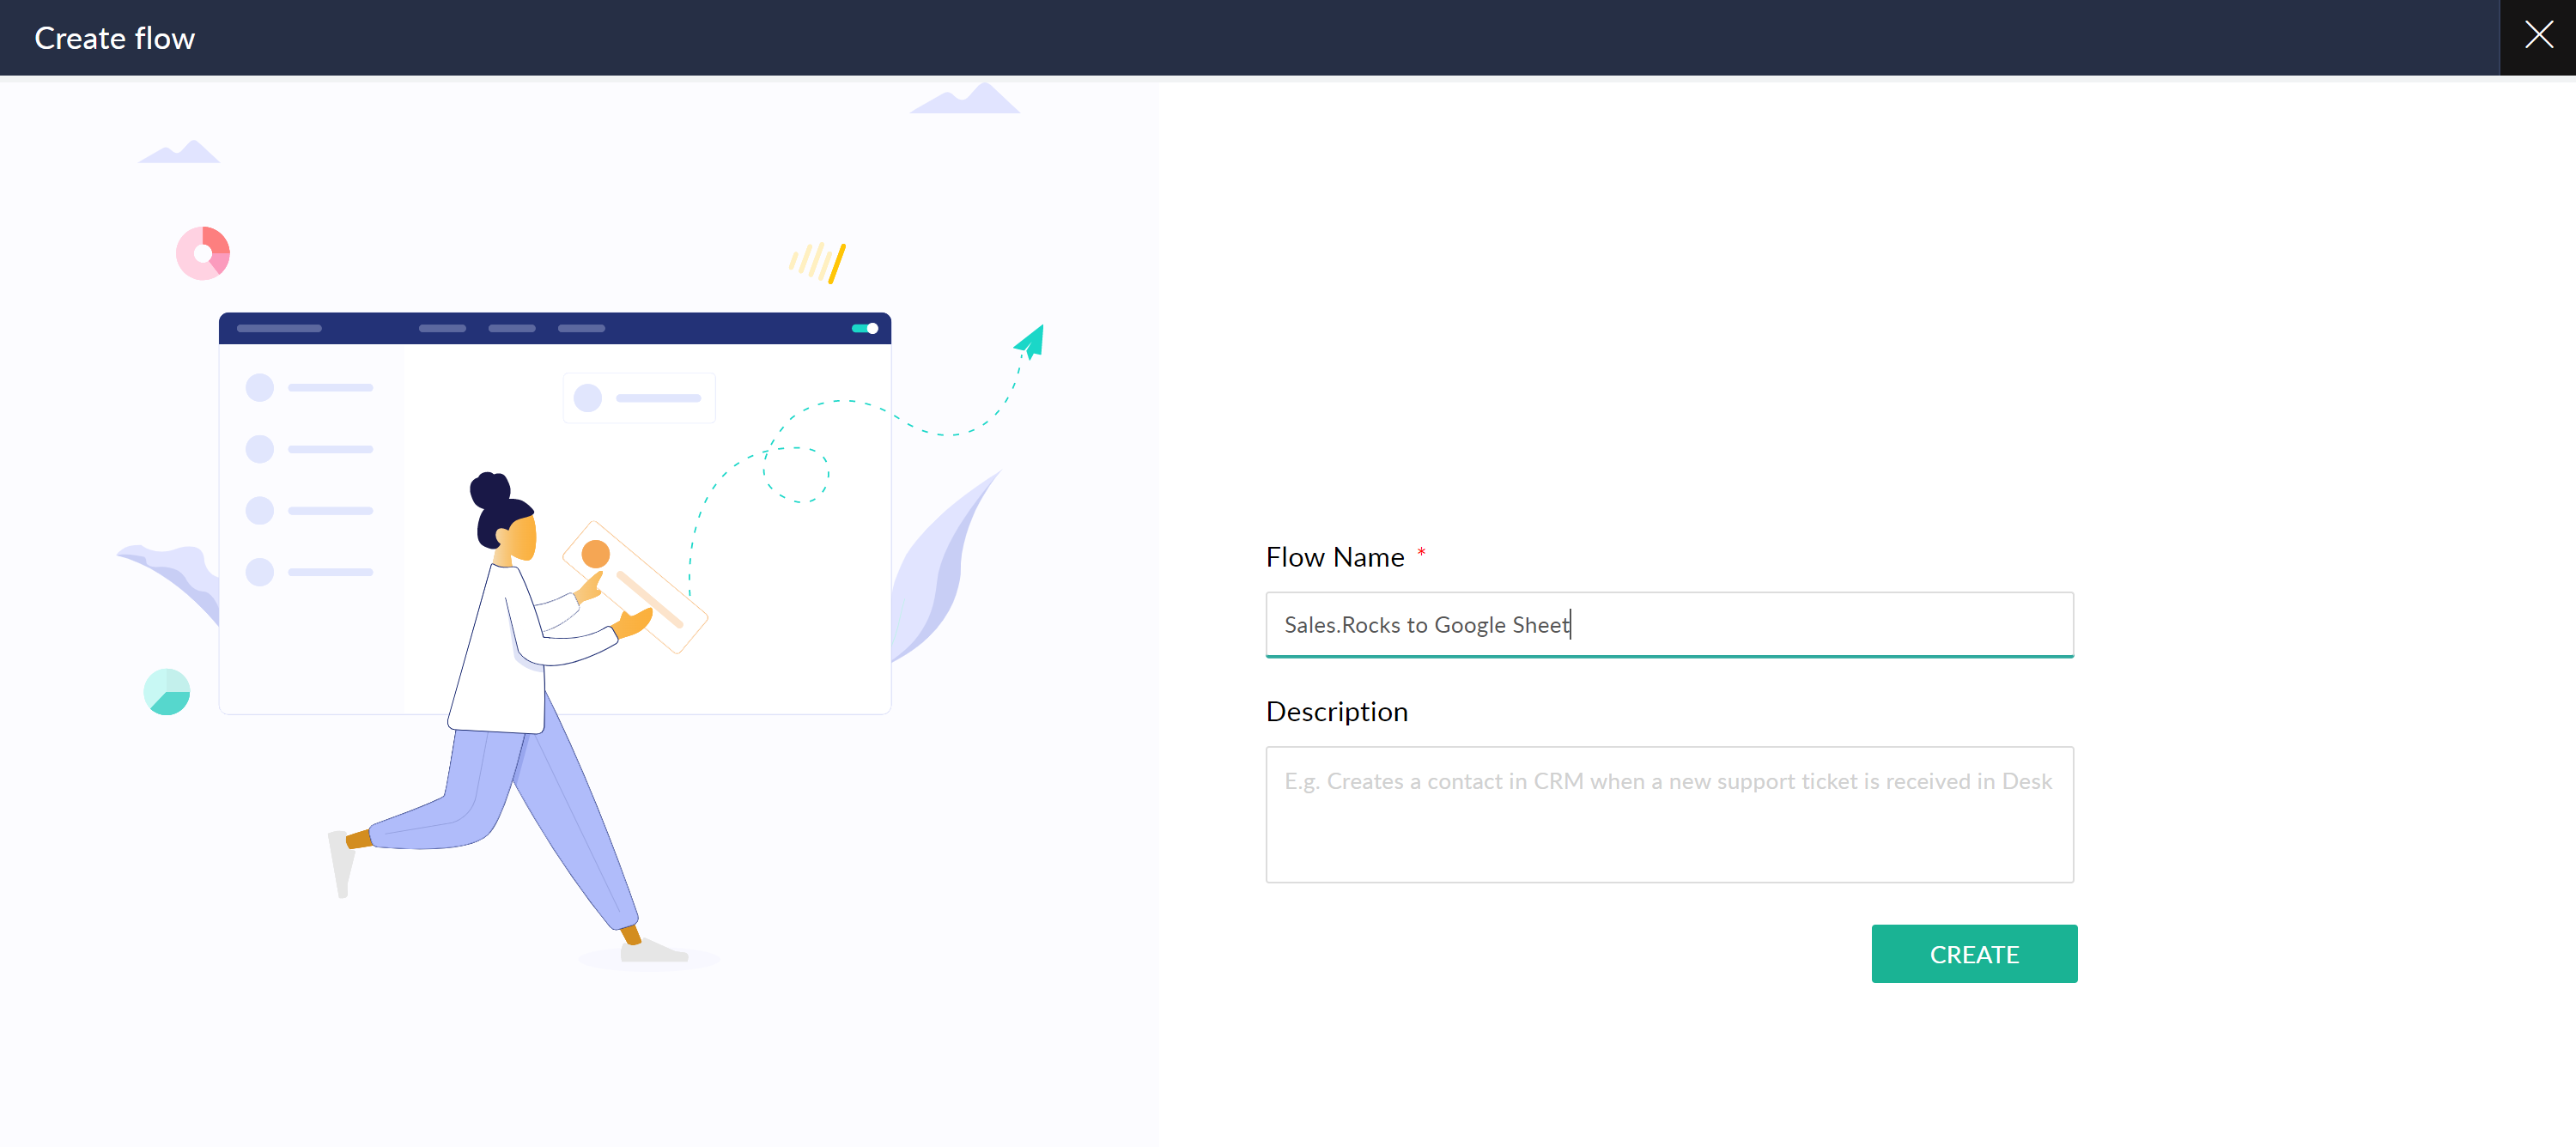
In this example, we'll push data from the Sales.Rocks Drip-Campaigns to Google Sheets.
After creating the Flow, continue the setup by choosing "Webhooks" as an option to configure the flow (you'll need to choose Webhooks for the rest of the 3rd-party apps as well).
.png)
After selecting the Webhook configuration, choose JASON as the format and then copy the created URL.
.png)
For Zapier, the flow would look very similar by choosing the Webhooks (premium) option.
.png)
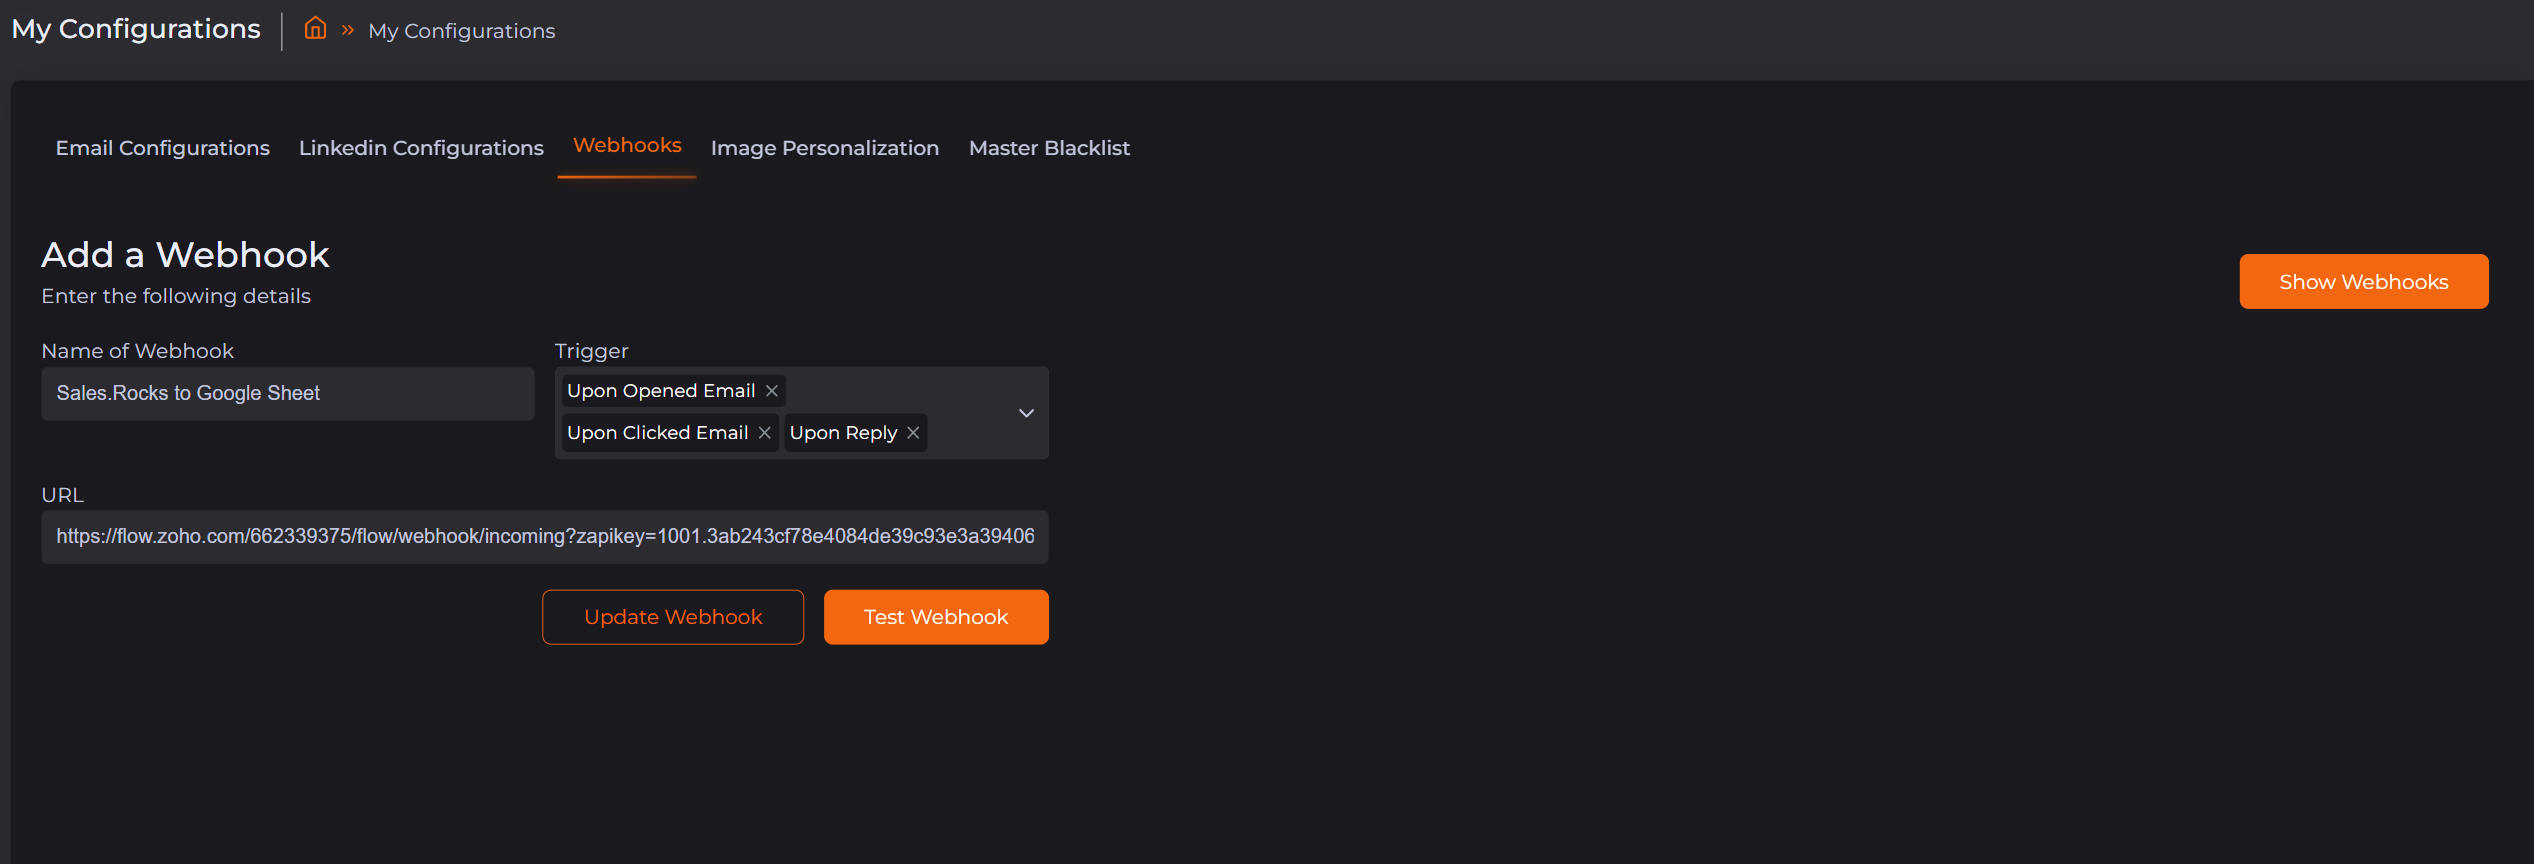
2. Creating the Webhook on Sales.Rocks
.png)
On the next screen, give your Webhook a name (this usually is something that should remind you of the connection you've established between apps, so the names of the apps would be the most common naming - e.g. Sales.Rocks to Google Sheets, but you can name it as you like).
.png)
-
Upon opened email
-
Upon clicked email
-
Upon reply
And, add the copied Webhook URL we created in the previous step.
.png)
You can additionally combine more Triggers for the same Webhook, or use all 3 Triggers and filter the actions afterward, within your list.
3. Testing the Webhook connection
Once you are done configuring the Webhook on both apps, it's time to test the connection. You should be able to find the 'Test Webhook' button on both parties.
.png)

.png)
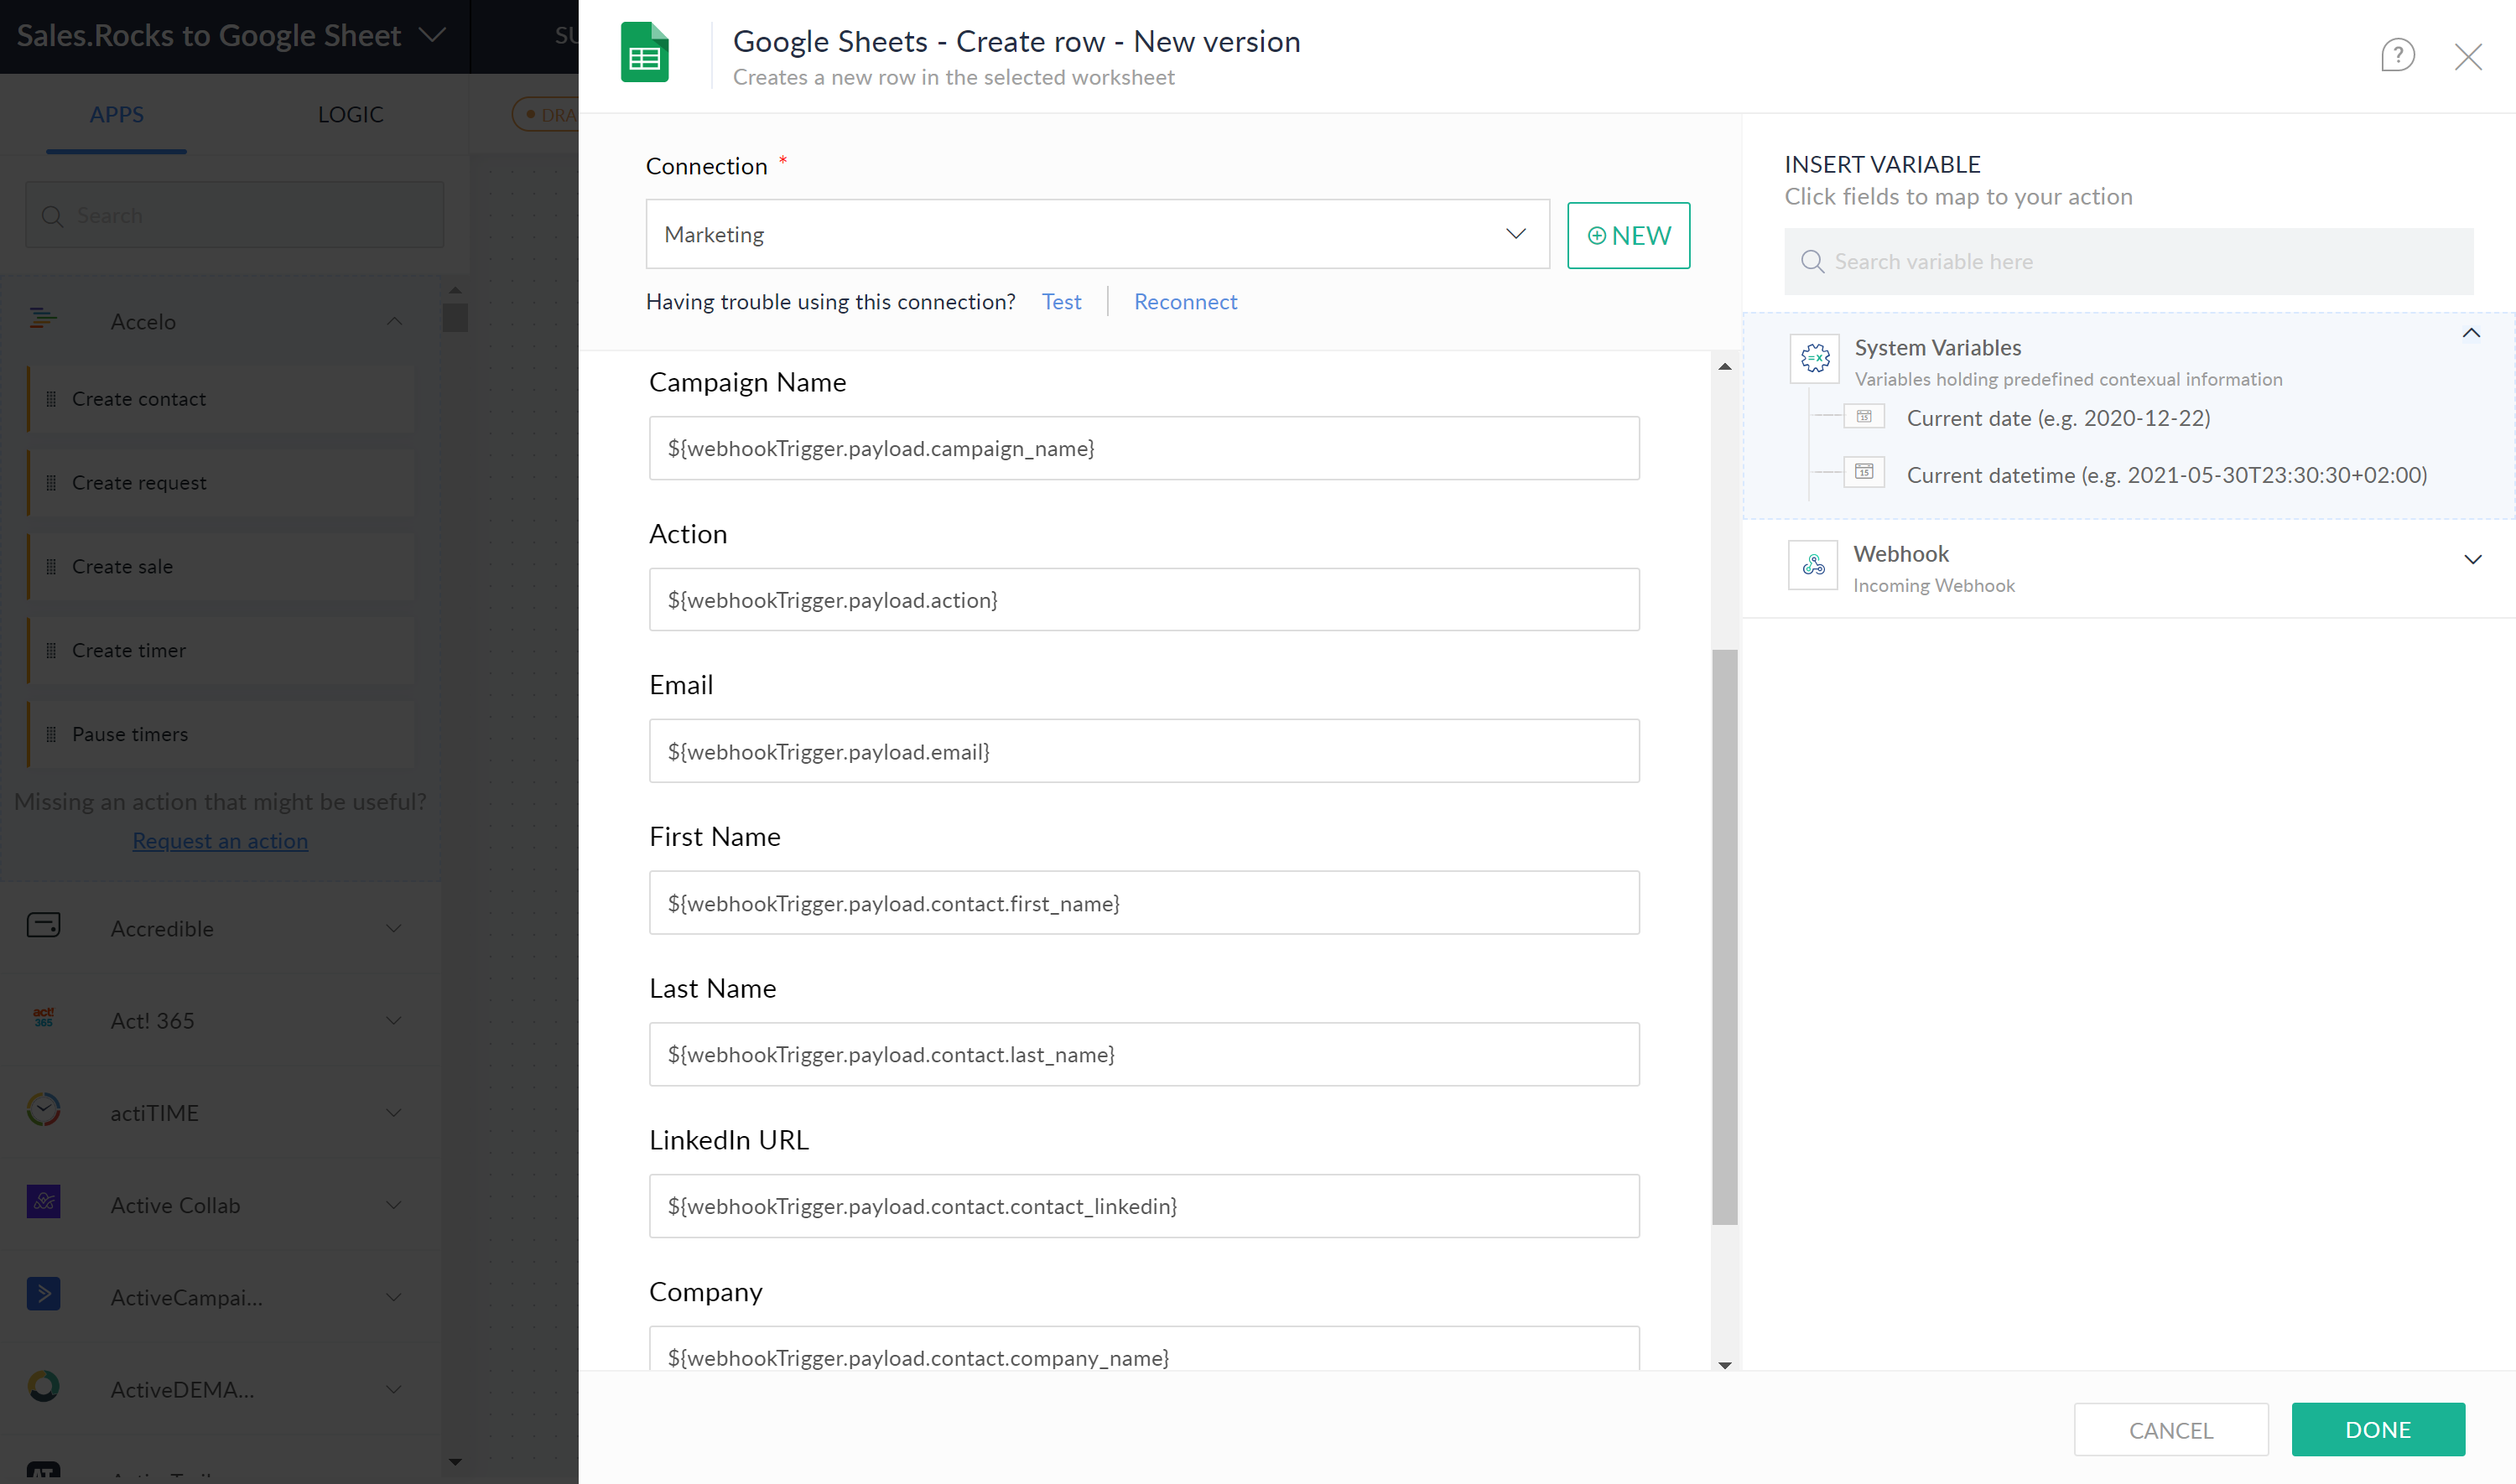
4. Connecting Sales.Rocks with your App

.png)
Find 'Google Sheets' in the Apps menu and add it to the Flow Builder.
.png)
Zoho Flow will require authorization to be able to read the list we've just created. Allow access and continue mapping the fields by clicking on the matching field from the webhook to your list:

5. Using the Webhook in the Sales.Rocks Drip-Campaigns
Now that you are done setting up the Webhook on both ends and connecting it successfully, it's time to use it in a campaign.
The Sales.Rocks Webhooks are used on a campaign level, meaning you can set a different Webhook with a different flow, connection, and trigger for each separate campaign you create.
.png)
Depending on your schedule, the campaign will start on the set time and date, and you should immediately (after a couple of minutes depending on the used apps) see the information being passed and the rows and columns being populated in the Google Sheet you've connected to the campaign (in our example both recipients opened the sent email and were pushed in the Google Sheet with all mapped data).
.png)
.png)
6. Deactivating a Webhook in Sales.Rocks
.png)